IKEA Wardrobe Hack In Charming Little Girl's Bedroom
I just love this darling little girl's room, it belongs to a friend of mine in the Netherlands and you're going to just love touring it with me today. It definitely transported me back in time to my own childhood bedroom.
I remember how much I loved my room and adored decorating it and like this little one, I was quite active in space doing all sorts of things. Especially playing with my dolls and writing books. I just loved to write (and still do). Lola, who is the daughter of Designer and Blogger Holly Marder, is just the cutest little thing too. I've met her a few times and she's a mini version of her mom all the way.
Want to see her adorable room today? Also, her mom did an amazing job on hacking an IKEA wardrobe, which she has detailed below in case you want to try it.
IKEA wardrobe hack details, straight from the designer herself, Holly Marder:
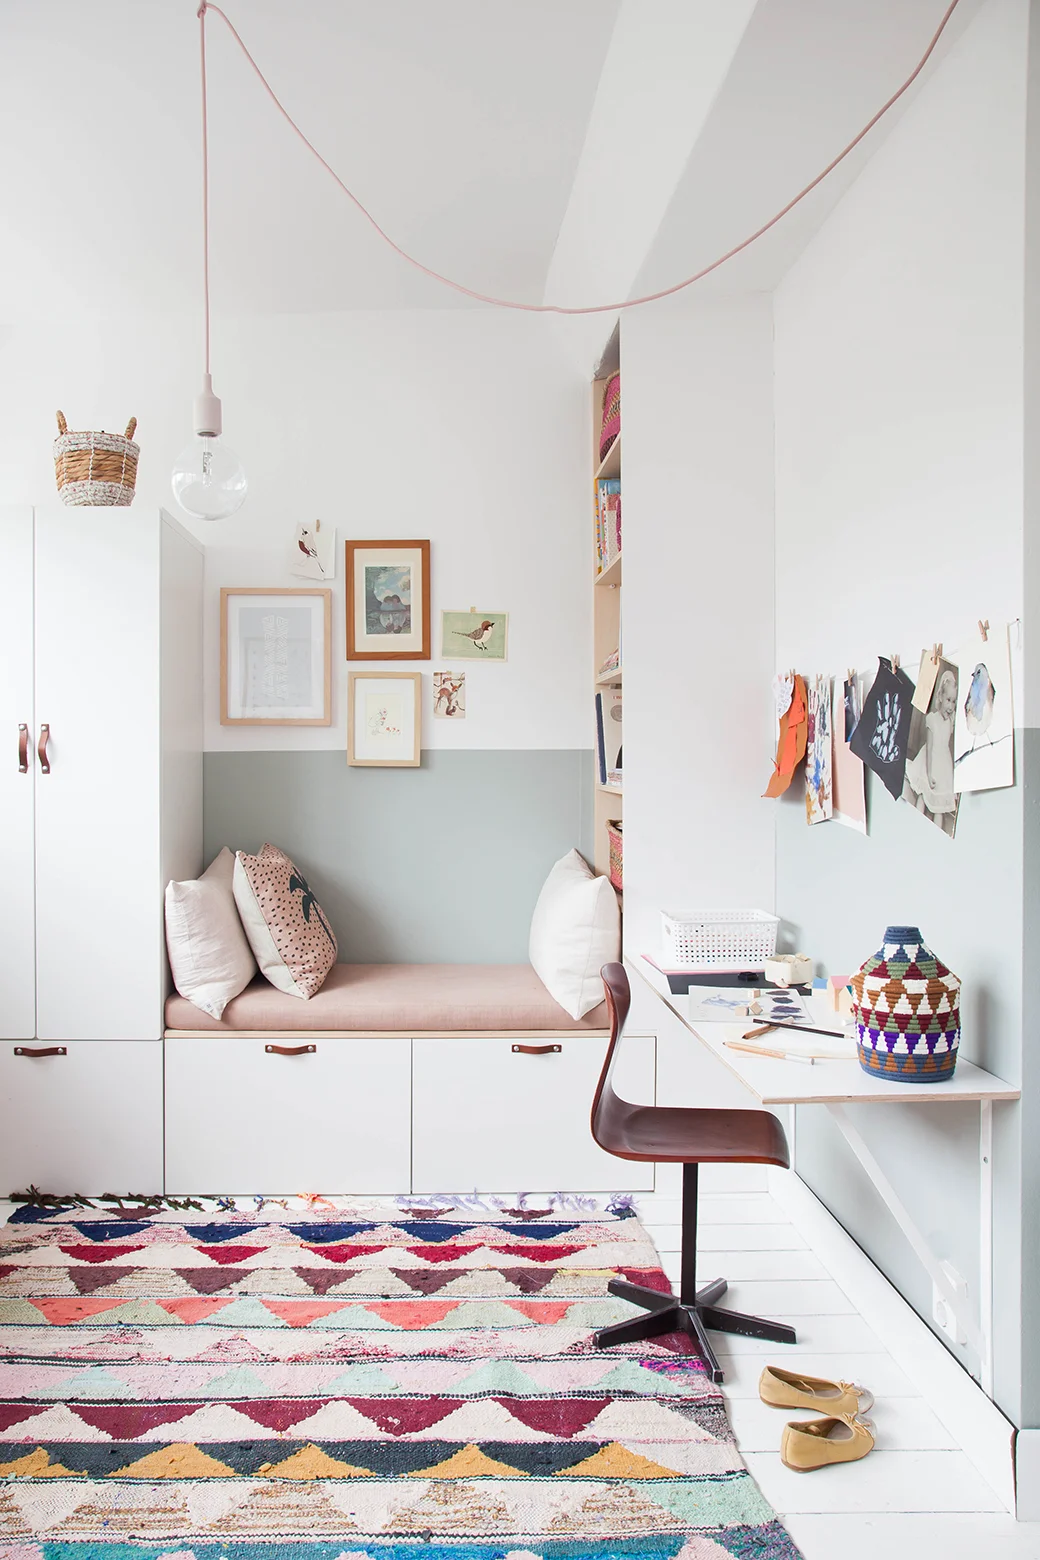
When designing this wardrobe, storage and desk area we had one main challenge to contend with. There are two metal heating pipes which are exposed and run down and along the wall, taking up about 10cm of space. This meant that any piece of furniture we placed against that back wall would never have sat flush against the wall. I wanted to create a built-in reading nook that connects to a wardrobe and bookshelf, with a desk area for her to color/draw/do homework one day/stare at the wall. I wanted it to be inexpensive and one way to achieve that is to use cost effective IKEA pieces as the base as opposed to hiring a carpenter. But because of the exposed pipes we ran into a few problems. And as much as I would have liked to, putting the pipes into the wall wasn’t an affordable option. With a bit of mathematics and a lot of time sifting through the IKEA catalogue, we decided to combine two of their popular lines – Besta + Stuva + a little bit of our own carpentry.
We used a Besta sideboard along the floor to create the base of the wardrobe and reading bench because each element is 40cm deep and 60cm wide. We then placed a Stuva wardrobe on top of the left-most Besta element because it is 50cm deep and 60 wide. So it basically fit perfectly on top width-wise, but had an extra 10cm behind it to allow space below for the metal heating pipes, but lean flush against the wall from the top of the bench up. Once the Ikea elements were in place, we built a bookshelf to the right using multiplex birch wood. We placed the back panel against the pipes that stick out a bit, and then cut a side panel to size to cover the little gap that left down the right side, and go all the way to the ceiling and sit nice and flush with the wall and ceiling.
We then obviously had a 10cm gap between the wall and the middle Besta units, so we placed a sheet of multiplex on top to hide the gap. I had a custom cushion made for on top upholstered in an old rose linen blend fabric, which completed the picture.
We built a simple desk with large brackets out of multiplex and painted the desk top and side panel of the bookcase white to blend with the Ikea elements, but left the inside of the bookshelf and edges of the desk unpainted for some contrast.
The door fronts of the Stuva wardrobe typically come as a set of two, one with a handle cut into it and one without. To make the entire design look and feel uniform, I purchased a second set of doors and used only the two flat doors and finished off all the doors with leather handles in chestnut from Design Studio Nu.
Isn't this the sweetest little room ever?
(Styling + Photography: Holly Marder)


